2. Remove the two screws.
3. Pull the cover out. This is a little tricky since it's so large!
4. Remove the three screws and pull the cluster out.
5. The cluster has two wires attached to the top on both sides (circled). To make it easier, use a flathead to press the clip in while pulling the connector out.
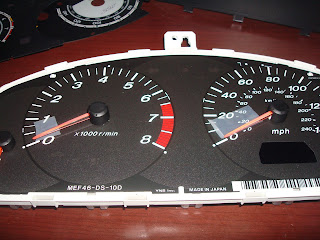
6.Bring the cluster indoors on a flat surface. You will need to remove the plastic shield (clear circled tabs) and then the black cover(black circled tab) to get to the flat surface of the gauge.
7. With the gauge exposed, you can mark the position of your needles if you want to. My car's needles all fall to the 0 position when turned off, so I can just remember the position. Keep in mind the more you toy with the needles, the greater chance you have of needing to calibrate them.

8. Place the overlay for the temp gauge and the tach
by feeding the overlay through the needles. the position shown worked best for me.
9. For the other half I suggest you remove the speedometer needle. Use a flathead (a plastic butter knife also works) to gently lift up under the needle and use your fingers to lift it up. It takes some force, but it will come off. Remember the exact angle the needle was in when removed! Be careful not to break your needle and not to scratch the stock overlay!
10. The other one is tricky. It is okay to bend the overlay a little to work it on. Make sure both overlays match up with the indicator lights on the stock cluster. Once aligned, tape the sides down around the edges. I used black electrical tape with good results.
11. With the overlays on, we need to test if the needles need to be calibrated. You can choose to re-attach the black piece or leave it off. Note that the tabs for the wires will stick out of the bottom.
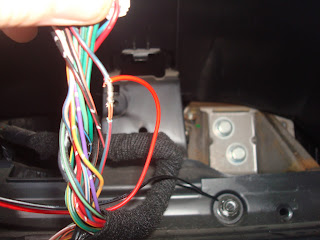
12. Now the good stuff, we need to power the overlays! Remember that black power inverter with the dial and add logo on it? Back in the car at the exposed wires we are going to ground the negative (black) wire by loosening the bolt on the right side then putting the wire in between and tightening the bolt. You'll want to separate the red and black wires some and have some slack for...
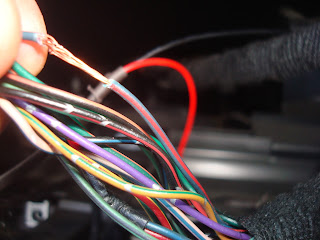
13. We need to strip some plastic off the (wire unknown) on the right cable to expose the wire. Cut some plastic off the positive (red) wire from the power inverter and twist it so the wire it tight. Now use your preferred method of splicing to join the wires.
14. Here the red wire is twisted around the (wire). Wrap some electrical tape around. I wouldn't suggest soldering yet.
15. Reattach your negative battery cable and confirm the light is showing on the ADD logo on the inverter. You can adjust the brightness and color with the dials on the side.
16. Confirm the lights only come on with the parking lights, low beams and high beams. If not, you're going to have to keep testing wires for the positive until you get the correct one! I decided not to keep mine installed as I was not happy with the final appearance.


No comments:
Post a Comment